

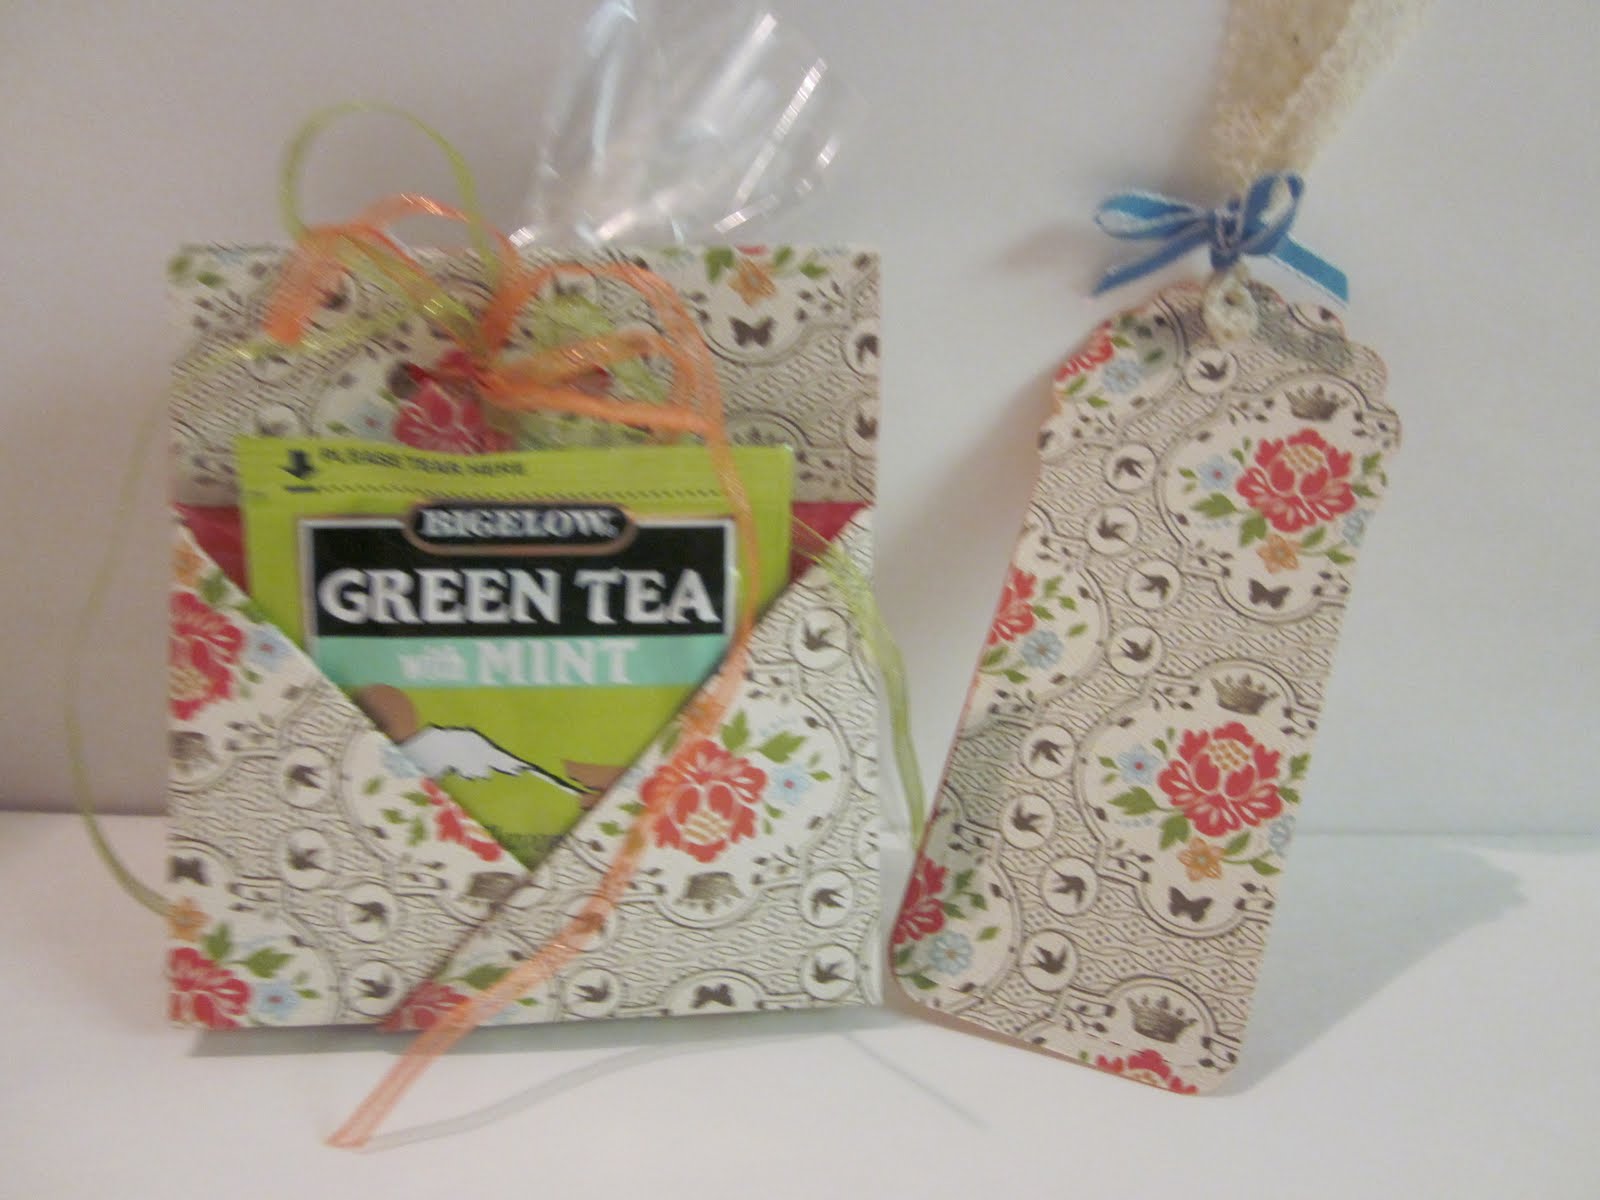
Notice the little center on my bookmark that sits in the project? You can make one and it adds a great bit of dimension to the flower. Just get the new blossom punch and fold inward all the petals (sponged it looks great) When you push down the last petal poke it under the first folded petal. Kind of neat right?
The dimensions for my project are 12x12 then minus 3.5 inches off one side.
making paper 12x8.5"
score on short side at 2.5" and 6"
Score on long side at 1.25, 2.5, 5, 7. 9.5 and 10.75
you will need to cut the 2.5" squares off each corner there is a score in there that will be used later but just ignore it when cutting the 2.5" squares off.
The next squares get folded toward the middle on the diagonal.
There will be two flaps on each side of the center fold them inward and you will see where the pockets are made from.
Turn the paper over finding the 5 and 7" scores and bending them so the ends of the paper meet forming a tent shape. that top (first and last) score can be folded inward or outward depending on which side you want showing. Your crop a dile will come in handy for making two holes at the top where you folded the paper over and the ribbon that holds the cookies (2 in either a 4x6 bag or a clear envelope with the top cut off and a bread tie around it) The outer pockets hold the tea. This project is great because it uses no adhesives! Just the Ribbon which I know we all have plenty of! I will try to get a better tutorial up soon. At least with some pictures of the steps. For now I am on the Road.

This one is made from the everyday elegance DSP in the Saleabration mini. The best part is the paper is FREE! yes with every $50 order you get a free saleabration item. If you are a hostess there is a free hostess bundle for qualifing sales!
The Bookmark is made by stamping the tea cup from the Tea Shoppe set also in the Ocassions mini and cutting a template and tracing it onto glossy white paper. Then cut that out and stamp it with versamark with the bordering on Romance stamp set (also in the ocassions mini) then clear embossing powder is added and heated and image colored with our wonderful classic Markers that seem to glide across the image. I added a tiny bow on the handle of the cup and added it to the two tags die. Simply fold your 8.5x2.5 piece of paper and put the fold just below the top scallops and it will make a cute book mark that you can add my poem to or just stamp your own sentiment.

This next view is of the center parts where I store our sweet pressed cookies. The cookies use the shortbread recipe. I found if you are having trouble using the press you are probably putting the whole egg in.
Just put the yoke into your ingredients and no egg whites! The egg whites cause it to be too sticky. You must also use real butter and don't line your cookie sheets just put the dough directly on sheet.


Thanks for your kind comments.
Debi Pippin
Here is a link to a video tutorial it will make things a little clearer for you...
Although she refused to give me credit for my original design. Not sure why some demonstrators are like that but to each his own.
Thank you Kimberly Morris
http://www.procrastistamper.blogspot.com/
I love this little cookie holder! it's darling...and I wish I could have seen you put it together in person! Will you be doing a photo tutorial or video on it? I'm having some trouble following the directions written...thanks so much! Patty
ReplyDeletewww.rocpaperstamps.com
Well done! I'm sure everyone at Leadership loved it too! TFS all the details.
ReplyDeleteYou did a GREAT JOB on your demonstration at leadership. I am one of the Montana girls you had lunch with that day. Just wanted to pop in and let you know that I know you were nervous but you really didn't appear nervous when I came by your booth. Nice job and thanks for sharing your ideas with us. I hope the other gals that demoed will share their ideas with you. My camera died right after your booth (and it was the first one I went to) so I didn't get pictures. I took some notes so hope to get to my stamp room soon and get some ideas down to cardstock.
ReplyDeleteThanks Ladies,
ReplyDeleteYes Patty I do hope to get tutorial up soon.
Debi
Debi great projects and beautiful work. saw your comment on SC. hugs
ReplyDeleteThanks for your comment on my blog. :-) And thanks for posting the directions to your project! I'll have to give this a try. I didn't get to see it in person but it looks adorable.
ReplyDeleteP.S. I also love the creative flower centers on your 3-D swaps!
Thanks Allison. I just played around with the new punch until I figured that out. Had fun showing it at leadership and regionals.
ReplyDeleteShelli even liked it when I showed her after the mgr reception. I really enjoy sharing with everyone the little neat trick. I have done it with double sided paper and fold back each of the edges and it looks so cool.
Great project Debi, wish I'd have been there to see it in person!
ReplyDeleteThis comment has been removed by a blog administrator.
ReplyDeleteThanks Debi,
ReplyDeleteWas trying to get some ideas to make a tea shoppe birthday card and came across your tea bag/cookie holder . This is so darling, my friend is from England so this suits her to a tea!
Thanks for sharing it.http://https://www.youtube.com/watch?v=MiY41ijpzuI
ReplyDeleteJust worked on this during the basketball game. You gave great instructions and demonstration! Cannot wait to make these for a ladies luncheon in the spring. Thank you again!
ReplyDelete